How to Set up FamiKit on Parent's and Kid's Android Devices.
Detailed steps on how to set up FamiKit on parent's and kid's Android devices
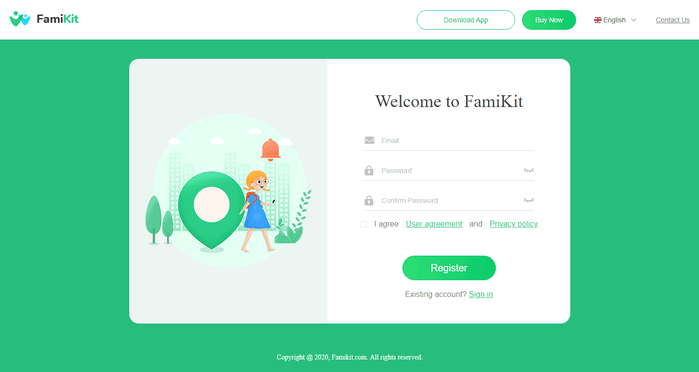
1. Register FamiKit
Register FamiKit with email to create a FamiKit account or you can do so after the installation of FamiKit app on your device.
2. Download and install FamiKit on both devices
Please visit FamiKit download page to download and install FamiKit both on your own device and your kid's device. After FamiKit is successfully installed on both devices, now you can start set-up procedures!
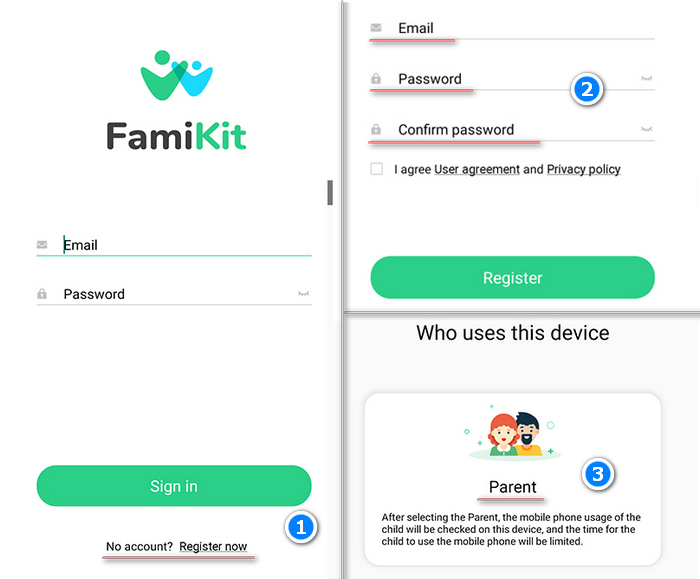
Set up FamiKit on parent's device
1. Launch FamiKit on your own device then scroll down to Register now to register with your email and set a password of it if you haven't done that before. Otherwise you can just log in with your account.
2. After sign in, choose Parent when asking "Who use this device".
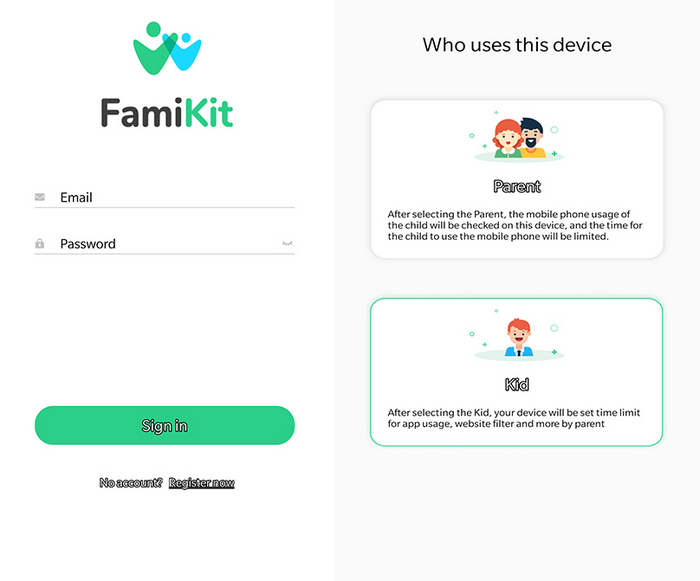
Set up FamiKit on kid's device
1. Sign in on your kid's device
Now go to kid's device then sign in with the registered account. Choose Kid when asking "Who use this device".
2. Set up permissions on kid's device
Follow the instructions given on the screen to fully authorize FamiKit on kid's device. For how it works, you can refer to the belows. Please note that FamiKit app on kid's device can't be uninstalled without password.
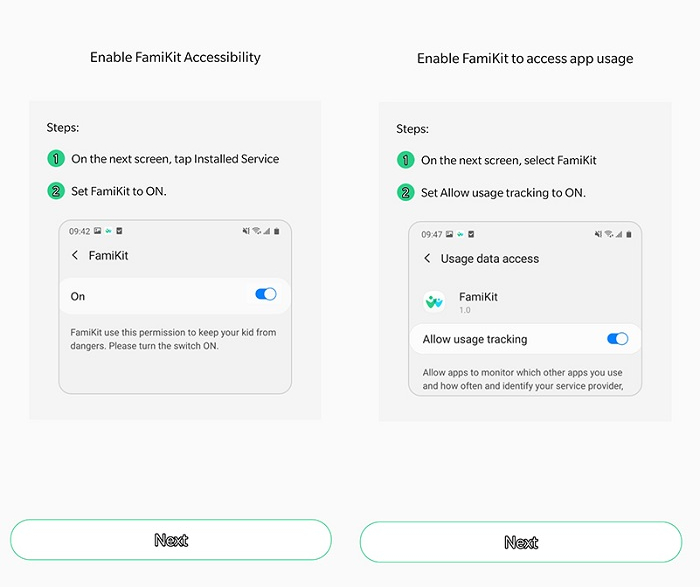
- Enable FamiKit accessibility: Choose FamiKit then turn on "Use service" option.
- Enable FamiKit to access app usage: Choose FamiKit then turn on "Allow usage tracking" option.
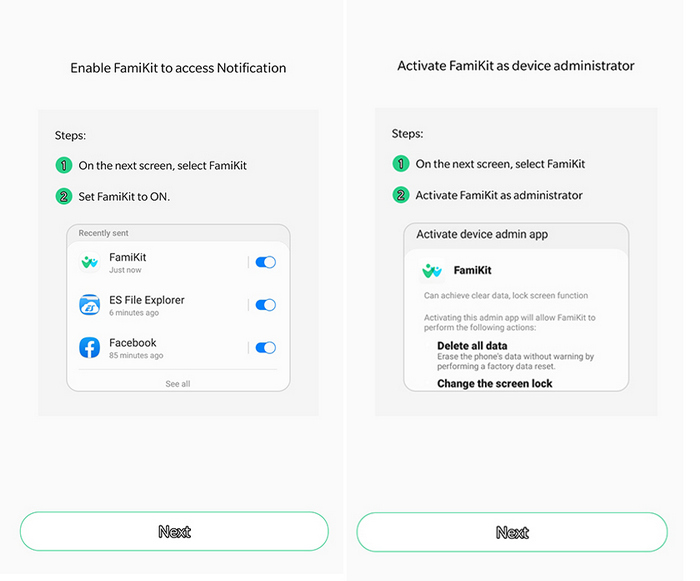
- Enable FamiKit to access notification: Toggle on the switch behind FamiKit.
- Allow FamiKit as device administrator: Choose FamiKit then go to "Activate the device admin app" to activate FamiKit as administrator.
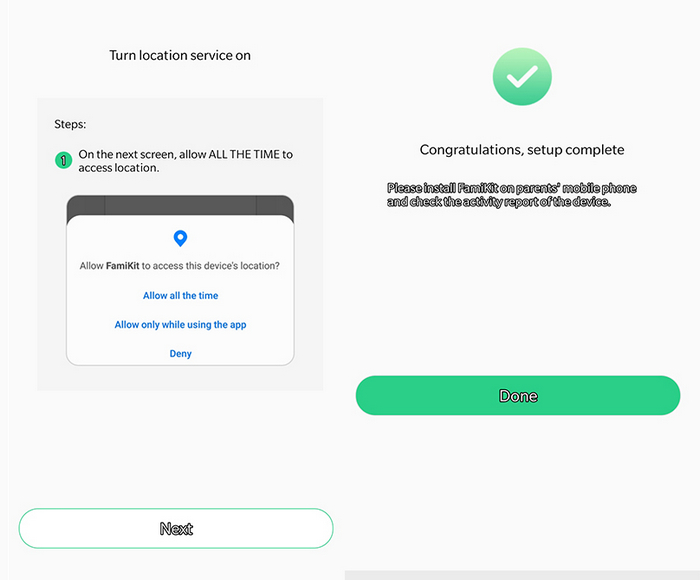
- Turn location service on: Tap "Allow all the time" to allow FamiKit to access the device's location.
- Choose "Allow" for other accessibilities.
3. Turn to parent's device to start supervising
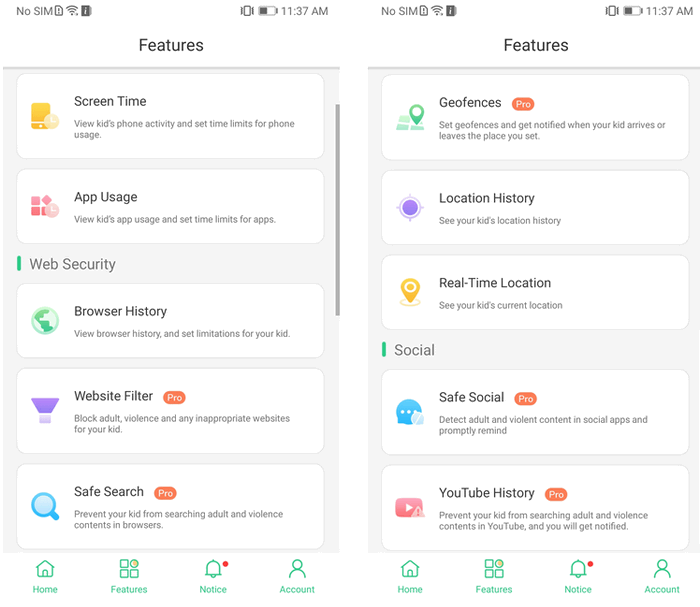
Go back to your own device and then you will be directed to the dashboard to check your kid's app activities, set time restrictions, block desired websites, track real-time location, set geofencing as well as monitor kid's YouTube watch histories and block them with FamiKit now!
Screen Time
What you can do with FamiKit's Screen Time:
- Check screen time report for Today, Yesterday and Last 7 days.
- Set maximum time that kid's phone can be used.
- Create curfews for kid's smartphone usage.
How to Use:
1. Navigate to Features then choose Screen time to view kid's screen time activities.
2. Tap Today, Yesterday or Last 7 days to get screen time reports.
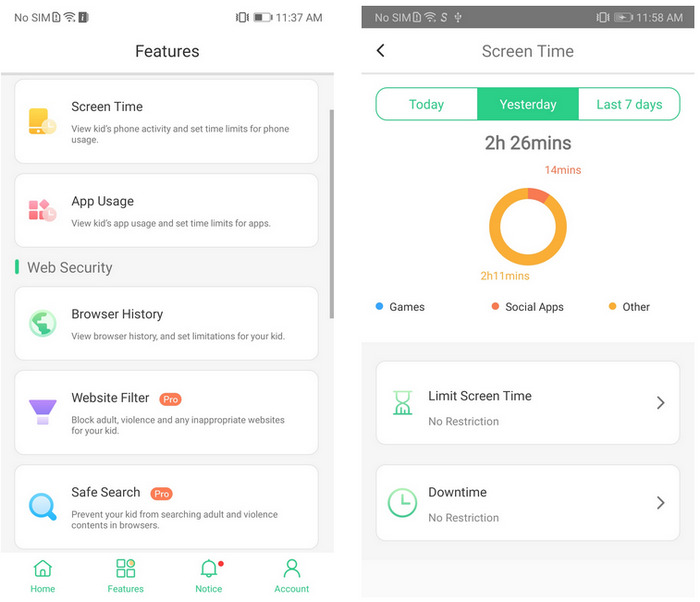
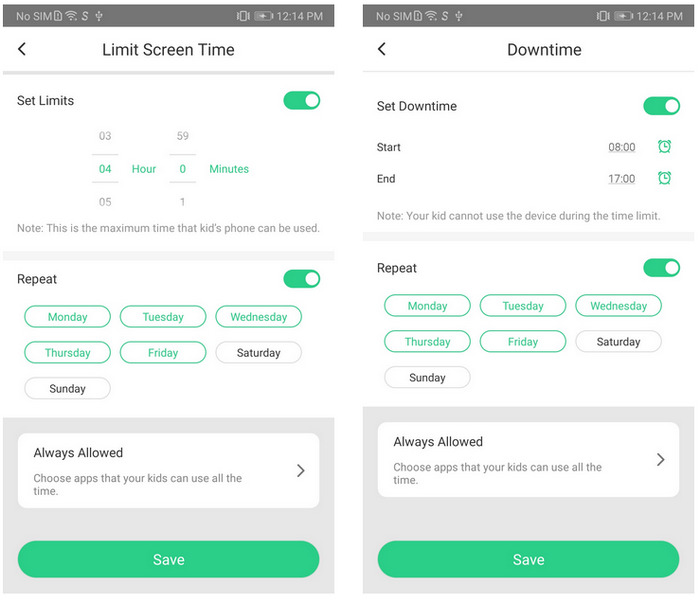
3. To decide how long your kid can access smartphone, tap Limit Screen Time and then toggle on the switch beside Set Limits. Scroll up and down to select desired hours and minutes, choose days and then enter Save to confirm. And you can choose apps that your kid can use all the time during this limits by tapping Always Allowed.
4. To lock down your kid's phone or set bed time, simply tap Downtime. Toggle on the switch beside Set Downtime, choose the time of Start and End, select days and then enter Save to confirm. Still you can choose apps that your kid can use all the time during this limits by tapping Always Allowed.
App Usage
What you can do with FamiKit's App Usage:
- Check frequently used apps.
- Track how much time is spent on each app.
- Set time limits for each app.
- Block apps during certain period.
How to Use:
1. Navigate to Features then choose App Usage.
2. Tap Today, Yesterday or Last 7 days to track app activities.

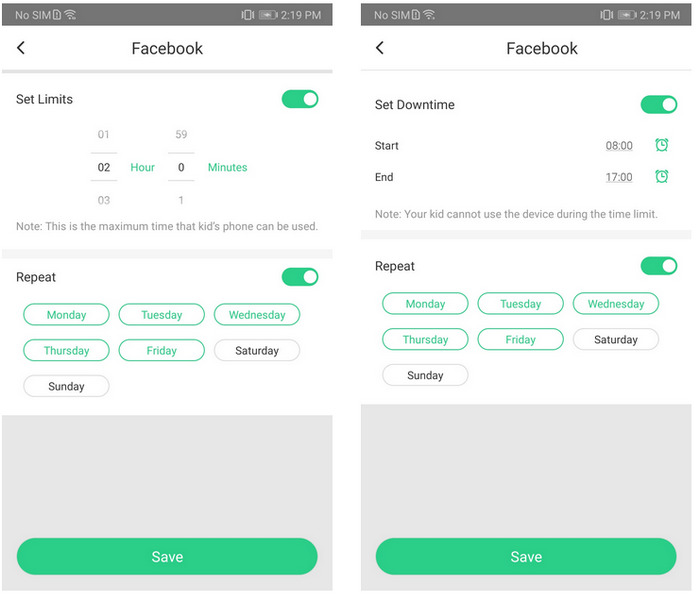
3. To set time limits for each app, tap Set time limits for apps then choose desired app. Here we take Facebook as an example. Select Facebook, tap Limit Screen Time, toggle on switch beside Set Limits, scroll up and down to choose desired hours and minutes. choose days and then enter Save to confirm.
4. To block apps during certain period, just tap Downtime, toggle on switch beside Set Downtime, choose the time of Start and End, select days and then enter Save to confirm.
Browser History
What you can do with FamiKit’s Browser History:
Remotely access kid’s browsing history of Chrome, Firefox, Edge and other browsers for today, yesterday and last 7 days; prevent or allow websites based on kid’s web history.
How to Use:
1. Navigate to Features then choose Browser History.
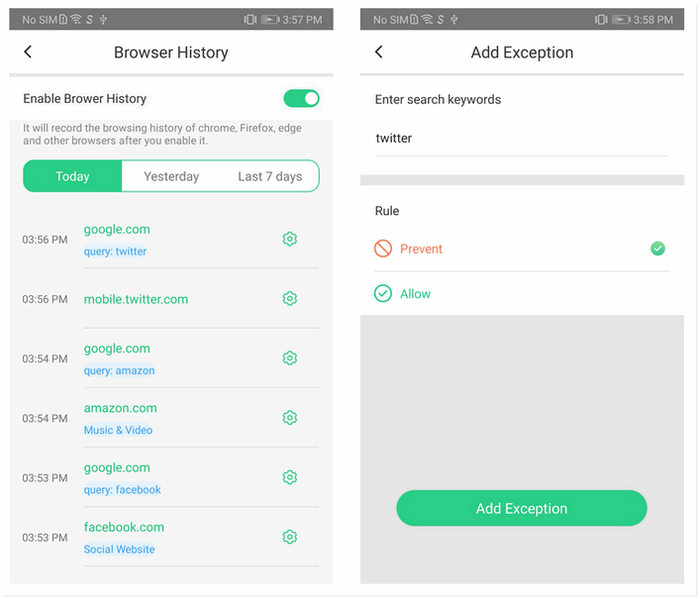
2. Toggle on the switch beside Enable Browser History then FamiKit will automatically record kid’s browsing history of Chrome, Firefox, Edge and other browsers for Today, Yesterday and Last 7 days.
3. Tap the gear icon beside browsing history to Prevent or Allow the site access.
Web Filter
What you can do with FamiKit's Web Filter:
- Block websites by category to prevent your kid from viewing adult and violence websites. Parents can block the category they do not want their kids to access.
- Block or allow websites by adding Exceptions.
How to Use:
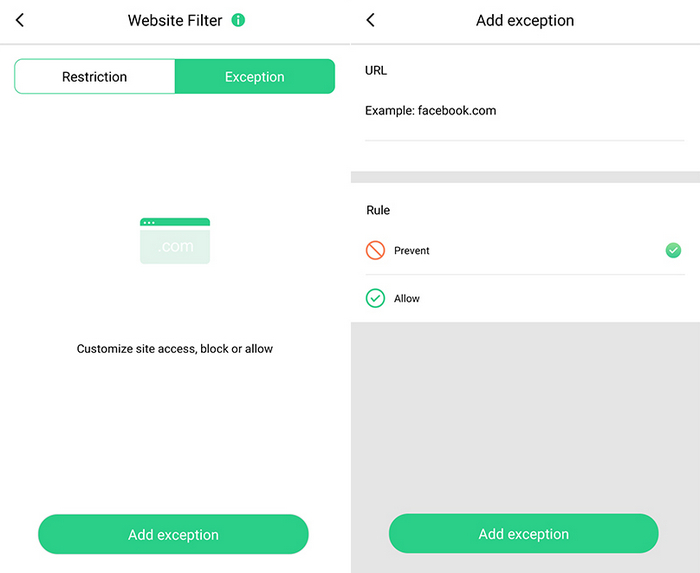
1. Navigate to Features then choose Website Filter.
2. Under Restriction, choose contents you would like to block or allow.
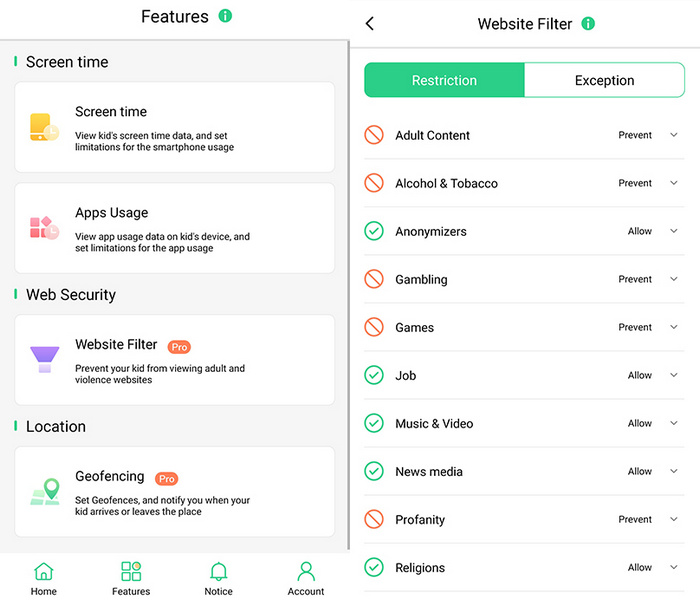
3. Under Exceptions, tap Add Exception to add a website, choose whether to block or allow access to it.
Safe Search
What you can do with FamiKit's Safe Search:
Detect risky words on browsers and prevent your kid from searching adult, violence or any inappropriate contents in browsers.
How to Use:
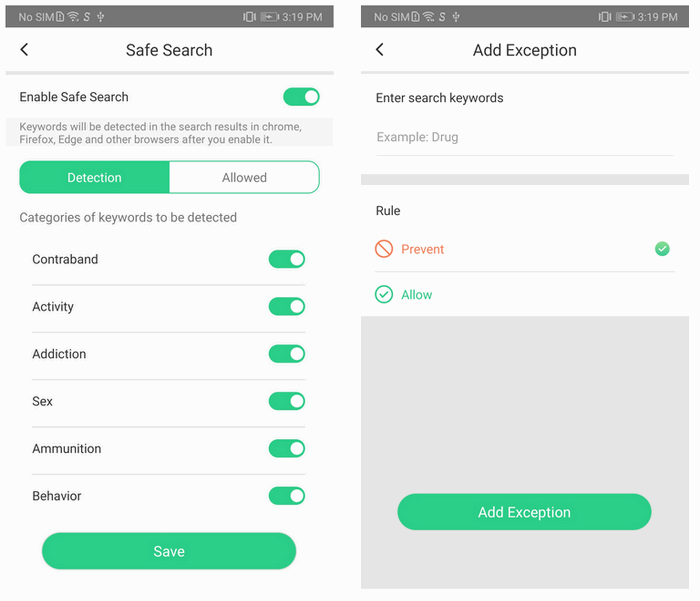
1. Navigate to Features then choose Safe Search.
2. Toggle on the switch beside Enable Safe Search.
3. Since the 8 categories of Contraband, Activity, Addiction, Sex, Ammunition, Behavior, Bully and Emotion are selected by default, parent can choose desired categories of keywords to be detected on kid’s browsers and then enter Save to confirm.
4. Tap Allowed > Add Exception, parents can Enter search keywords to customize risky words. Then tap Prevent > Add Exception to confirm.
Geofences
What you can do with FamiKit's Geofences:
Set up a specific area to get notified when kids enter or leave the area.
How to Use:
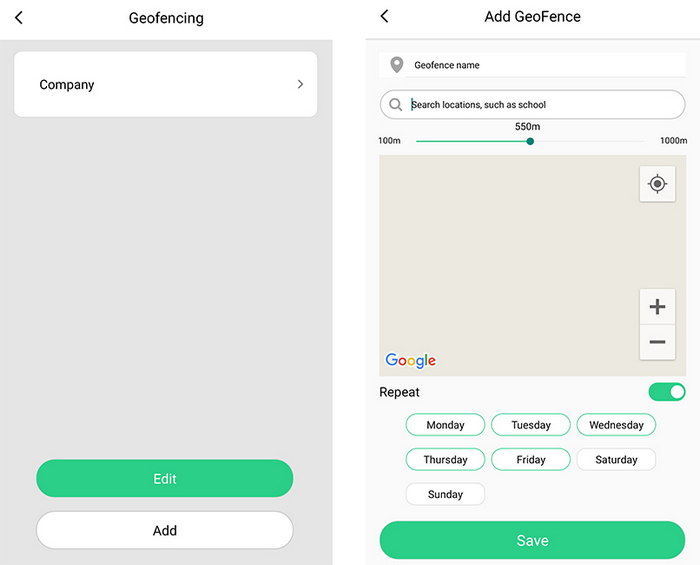
1. Navigate to Features then choose Geofences.
2. Tap Add to add a geofence. Enter a name for the geofence and search for the location you would like to set as a geofence.
3. Choose the range you would like to apply to the geofence area and tap Save.
4. You will get notified under Notice when your kids enter or leave the area you set up.
Location History
What you can do with FamiKit's Location History:
Track kid’s location history timeline for 7 days.
How to Use:
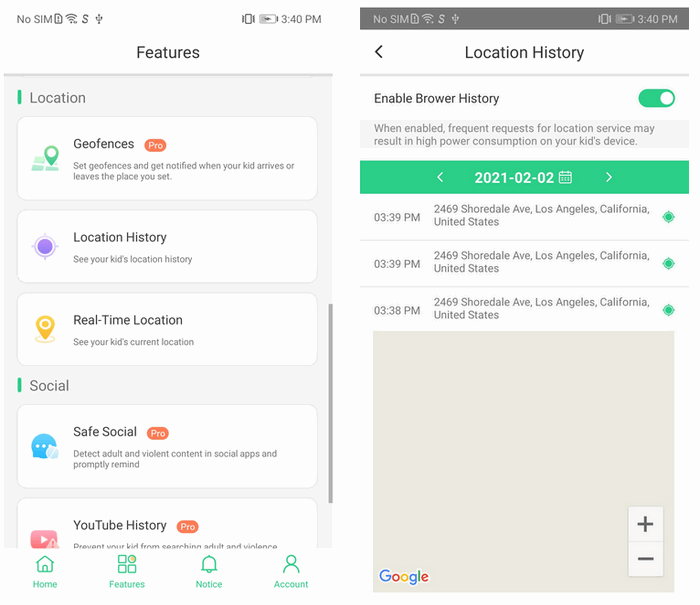
1. Navigate to Features then choose Location History.
2. Toggle on the switch beside Enable Browser History.
3. Select date within 7 days to track kid’s location histories.
Real-Time Location
What you can do with FamiKit's Real-Time Location:
Track kid’s current location.
How to Use:
1. Navigate to Features then choose Real-Time Location.
2. Click the refresh button to track kid’s real-time location.
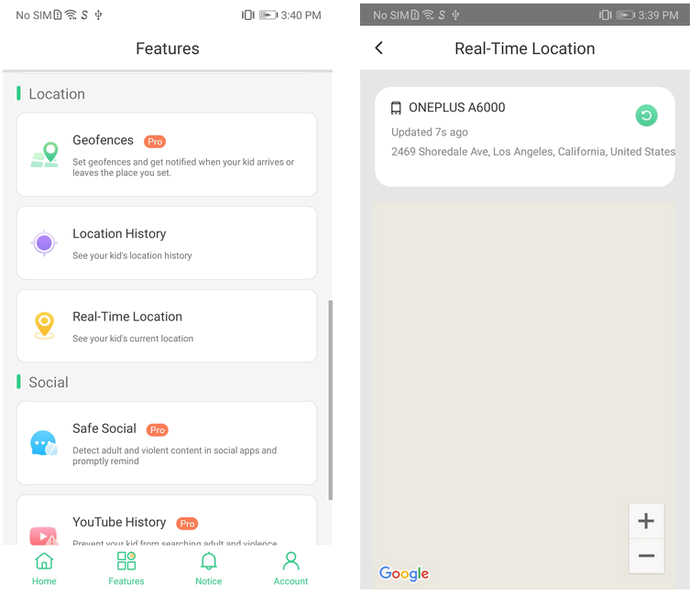
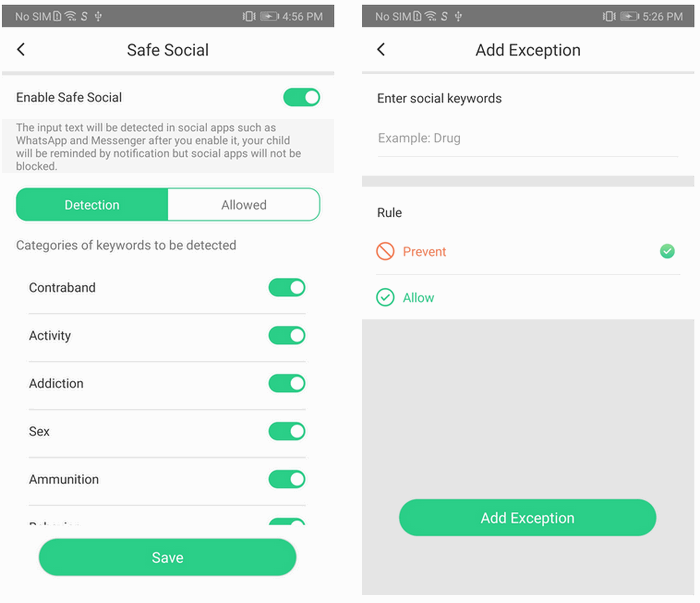
Safe Social
What you can do with FamiKit's Safe Social:
Detect adult, violence and any inappropriate contents in various social apps and get notified.
How to Use:
1. Navigate to Features then choose Safe Social.
2. Toggle on the switch beside Enable Safe Social.
3. Since the 8 categories of Contraband, Activity, Addiction, Sex, Ammunition, Behavior, Bully and Emotion are selected by default, parent can choose desired categories of keywords to be detected on kid’s social apps and then enter Save to confirm.
4. Tap Allowed > Add Exception, parents can Enter social keywords to customize risky words. Then tap Prevent > Add Exception to confirm.
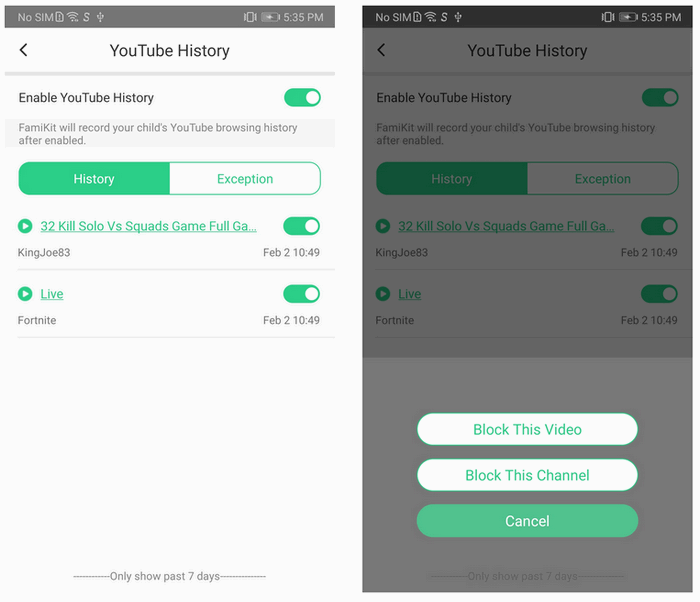
YouTube History
What you can do with FamiKit's Safe Social:
Track kid’s YouTube watch history and remotely block videos or channels.
How to Use:
1. Navigate to Features then choose YouTube History.
2. Toggle on the switch beside Enable YouTube History.
3. All the YouTube histories that your kid viewed will be displayed.
4. Toggle off the switch beside each YouTube history and parents can choose Block This Video or Block This Channel.


Ensure Kid's Safety
is What We’re about
Try FamiKit free for 7 days!
